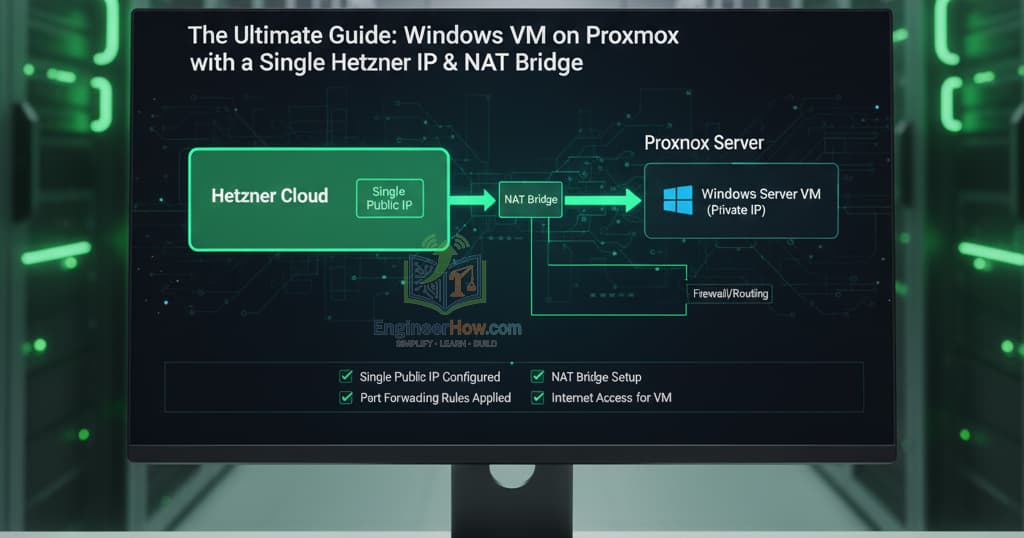
At EngineerHow.com, we love tackling real-world infrastructure challenges. A common scenario for anyone using a Hetzner dedicated server is getting a powerful Proxmox setup running, only to hit a wall on what should be a simple task: giving your Windows VM internet access. The culprit? That single public IP address.
This guide will walk you through the complete, end-to-end process of installing a Windows Server (or Windows 10/11) virtual machine on Proxmox and, most importantly, correctly configuring the network using a NAT Bridge so it can access the internet. We’ll cover VM creation, the Linux bridge setup, critical firewall rules, and finally, how to access and auto-start your VM.
Prerequisites
Before we begin, make sure you have the following:
A Hetzner dedicated server with Proxmox VE installed.
The Windows Server 2025 (or any other version) ISO file. You can download the latest evaluation version directly from the Microsoft Evaluation Center. Once downloaded, upload it to your Proxmox local storage.
The latest stable VirtIO drivers ISO. You can download it from the Fedora Project repository. This is essential for performance. Be sure to upload this to your Proxmox storage as well.
Part 1: Creating the Windows Virtual Machine
First, we’ll create the VM with the optimal settings for performance and compatibility.
In the Proxmox UI, click “Create VM”.
General Tab: Give your VM a unique ID and a descriptive name (e.g.,
win-serv-2025).OS Tab (Important Driver Step):
Select your Windows ISO file.
Guest OS Type:
Microsoft WindowsVersion:
11/2022/2025Check the box for “Add additional drive for VirtIO drivers”. This is a feature in newer Proxmox versions that simplifies the process immensely. Select your storage and the VirtIO driver ISO you uploaded. This automatically attaches the necessary drivers for the installation.
System Tab:
Machine:
q35BIOS:
OVMF (UEFI)Check the box for “Qemu Agent”. This improves host-guest interaction.
SCSI Controller:
VirtIO SCSI singlefor best disk performance.
Disks Tab:
Bus/Device:
SCSIStorage: Your target storage (e.g.,
local-zfs).Disk Size:
60GB or more.Cache:
Write back(for better performance).
CPU Tab:
Cores:
2or4for a server environment.Type:
host(This passes your CPU’s features directly to the VM).
Memory Tab:
Memory:
4096MB or more.
Network Tab:
Bridge:
vmbr0(for now – we will change this later).Model:
VirtIO (paravirtualized)for best network performance.
Confirm and Finish: Review your settings and create the VM.
Now, you can start the VM and proceed with the standard Windows installation. When you get to the disk selection screen, you’ll need to “Load driver” and point to the vioscsi\2k25\amd64 folder on the VirtIO CD to detect the hard drive.
Copyright © EngineerHow.com – Your source for practical engineering solutions.
Part 2: The Network Challenge – Configuring a NAT Bridge
After installing Windows, you’ll notice you have no internet. This is because your Proxmox host is using your single public IP on vmbr0. The VM cannot share it. The solution is to create a private network and use NAT to let the VM access the internet through the host.
Step 1: Create a New Linux Bridge (vmbr1)
SSH into your Proxmox host. We need to edit the network configuration file.
nano /etc/network/interfaces
Go to the end of the file and add this new block. This creates a private, internal-only network bridge.
auto vmbr1
iface vmbr1 inet static
    address 192.168.10.1/24
    bridge-ports none
    bridge-stp off
    bridge-fd 0
    post-up echo 1 > /proc/sys/net/ipv4/ip_forward
    post-up   iptables -t nat -A POSTROUTING -s '192.168.10.0/24' -o vmbr0 -j MASQUERADE
    post-down iptables -t nat -D POSTROUTING -s '192.168.10.0/24' -o vmbr0 -j MASQUERADE
Explanation:
address 192.168.10.1/24: This assigns the Proxmox host an IP on our new private network. This will be the gateway for our VM.bridge-ports none: Specifies this is an internal virtual switch with no physical NICs attached.post-upcommands: These are crucial. They automatically enable IP forwarding and add aMASQUERADE(NAT) rule toiptables. This rule translates any traffic from our private192.168.10.0/24network to the host’s public IP onvmbr0.
Step 2: Activate the New Bridge
Save the file and run:
ifup vmbr1
Troubleshooting Tip: If you get ifup: command not found, it means a necessary utility is missing or your PATH is wrong.
First, ensure you are fully root by using
su -(the hyphen is important!).If it still fails, install the recommended network manager:
apt update && apt install ifupdown2. Then tryifup vmbr1again.
Step 3: Switch the VM to the New Bridge
In the Proxmox UI, go to your VM’s Hardware section, edit the Network Device, and change the Bridge from vmbr0 to vmbr1.
Step 4: Configure a Static IP in Windows
Start your Windows VM. Go to Network Settings -> Change adapter options. Right-click the VirtIO Ethernet Adapter and go to IPv4 Properties. Set it up as follows:
IP address:
192.168.10.10Subnet mask:
255.255.255.0Default gateway:
192.168.10.1Preferred DNS server:
8.8.8.8Alternate DNS server:
1.1.1.1
At this point, you should be able to open Command Prompt in the VM and successfully ping 192.168.10.1. However, you still won’t be able to ping 8.8.8.8 or browse the web. One final step remains.
For more guides like this, visit EngineerHow.com.
Part 3: The Final Fix – Allowing Traffic Forwarding
The last piece of the puzzle is the Proxmox host’s main firewall policy. By default, it’s often set to DROP traffic that tries to move between interfaces (like from vmbr1 to vmbr0). We need to add rules to explicitly allow this.
Step 1: Diagnose the Firewall Policy
On your Proxmox host (SSH), check the FORWARD chain policy:
iptables -L FORWARD -n -v
You will likely see Chain FORWARD (policy DROP ...). This confirms traffic is being blocked.
Step 2: Add Rules to Allow Forwarding
Run these two commands on the Proxmox host to permit the traffic flow:
# Allow return traffic for established connections from the internet back to the VM
iptables -A FORWARD -i vmbr0 -o vmbr1 -m conntrack --ctstate RELATED,ESTABLISHED -j ACCEPT

# Allow new connections from the VM's private network out to the internet
iptables -A FORWARD -i vmbr1 -o vmbr0 -j ACCEPT
The moment you run the second command, your internet connection in the Windows VM will start working! You can test by pinging 8.8.8.8 and then google.com.
Step 3: Make the Firewall Rules Permanent
The rules we just added will be lost on reboot. To save them permanently, run this command:
netfilter-persistent save
Part 4: Accessing Your VM via Remote Desktop (RDP)
Now that your VM has internet, the next step is to manage it remotely without using the Proxmox console. Since the VM only has a private IP, we need to use Port Forwarding. We will forward a port from the Proxmox host’s public IP to the RDP port (3389) on our Windows VM.
Step 1: Add a Port Forwarding Rule
On your Proxmox host (SSH), run the following command. This rule tells the host to forward all incoming TCP traffic on port 33890 to our VM’s IP (192.168.10.10) on port 3389. We use a high, non-standard port like 33890 for a little extra security.
iptables -t nat -A PREROUTING -i vmbr0 -p tcp --dport 33890 -j DNAT --to-destination 192.168.10.10:3389
Step 2: Enable Remote Desktop in Windows
Inside your Windows VM:
Right-click the Start Menu and go to System.
Click on Remote Desktop on the left menu.
Toggle the switch to Enable Remote Desktop and confirm any prompts. The Windows Firewall rules are typically added automatically.
Step 3: Connect using RDP
On your local computer, open your Remote Desktop client.
Computer: Enter your Hetzner server’s public IP address, followed by the port we forwarded. For example:
195.201.172.13:33890Username: Enter the username for your Windows VM (e.g.,
Administrator).Enter your password and connect. You should now have full remote access to your VM’s desktop.
Step 4: Save the New RDP Rule
Just like our other rules, this port forwarding rule will be lost on reboot. To make it permanent, run the save command again on your Proxmox host. It will save all the current rules, including the new one.
netfilter-persistent save
Part 5: Set the VM to Start on Boot
For a server, you’ll want your VM to start automatically if the Proxmox host ever reboots.
In the Proxmox UI, select your Windows VM from the left-hand tree.
Go to the “Options” tab.
Find the item named “Start at boot”. It will be set to
Noby default.Double-click on it (or select it and click the “Edit” button).
Check the box for “Start at boot”.
You can also set a “Startup order” and “Startup delay”. For a single VM, leaving these at their defaults is fine. If you have multiple VMs (like a domain controller and a file server), you can use the order to ensure the domain controller starts first.
Click OK. The setting will now show as
Yes.
Conclusion
You have successfully configured a Windows VM on a Hetzner Proxmox server with a single public IP. By creating an internal network bridge and carefully configuring NAT, firewall forwarding, and port forwarding rules, you can provide robust, secure internet and remote access to any number of virtual machines.
At EngineerHow.com, we believe in empowering users by breaking down complex problems into manageable steps. We hope this comprehensive guide has saved you time and frustration. For more deep-dive tutorials on system administration, networking, and cloud engineering, be sure to check out our other articles!
🔗 Useful Links 📺 EngineerHow YouTube Channel
📢 About EngineerHow.com EngineerHow.com is dedicated to providing expert IT and engineering tutorials, helping professionals and enthusiasts set up servers, networks, and self-hosted solutions. Our guides focus on step-by-step instructions to make complex topics easy to understand.
🚀 Explore More IT Guides: EngineerHow.com
💬 Join the Discussion! Have questions or insights? Drop a comment below and let’s discuss!
Copyright © 2025 EngineerHow.com. All Rights Reserved.